The Luscious Ladies

A Guide to Getting Published

Photo Shoot TipsMayzie MacComment

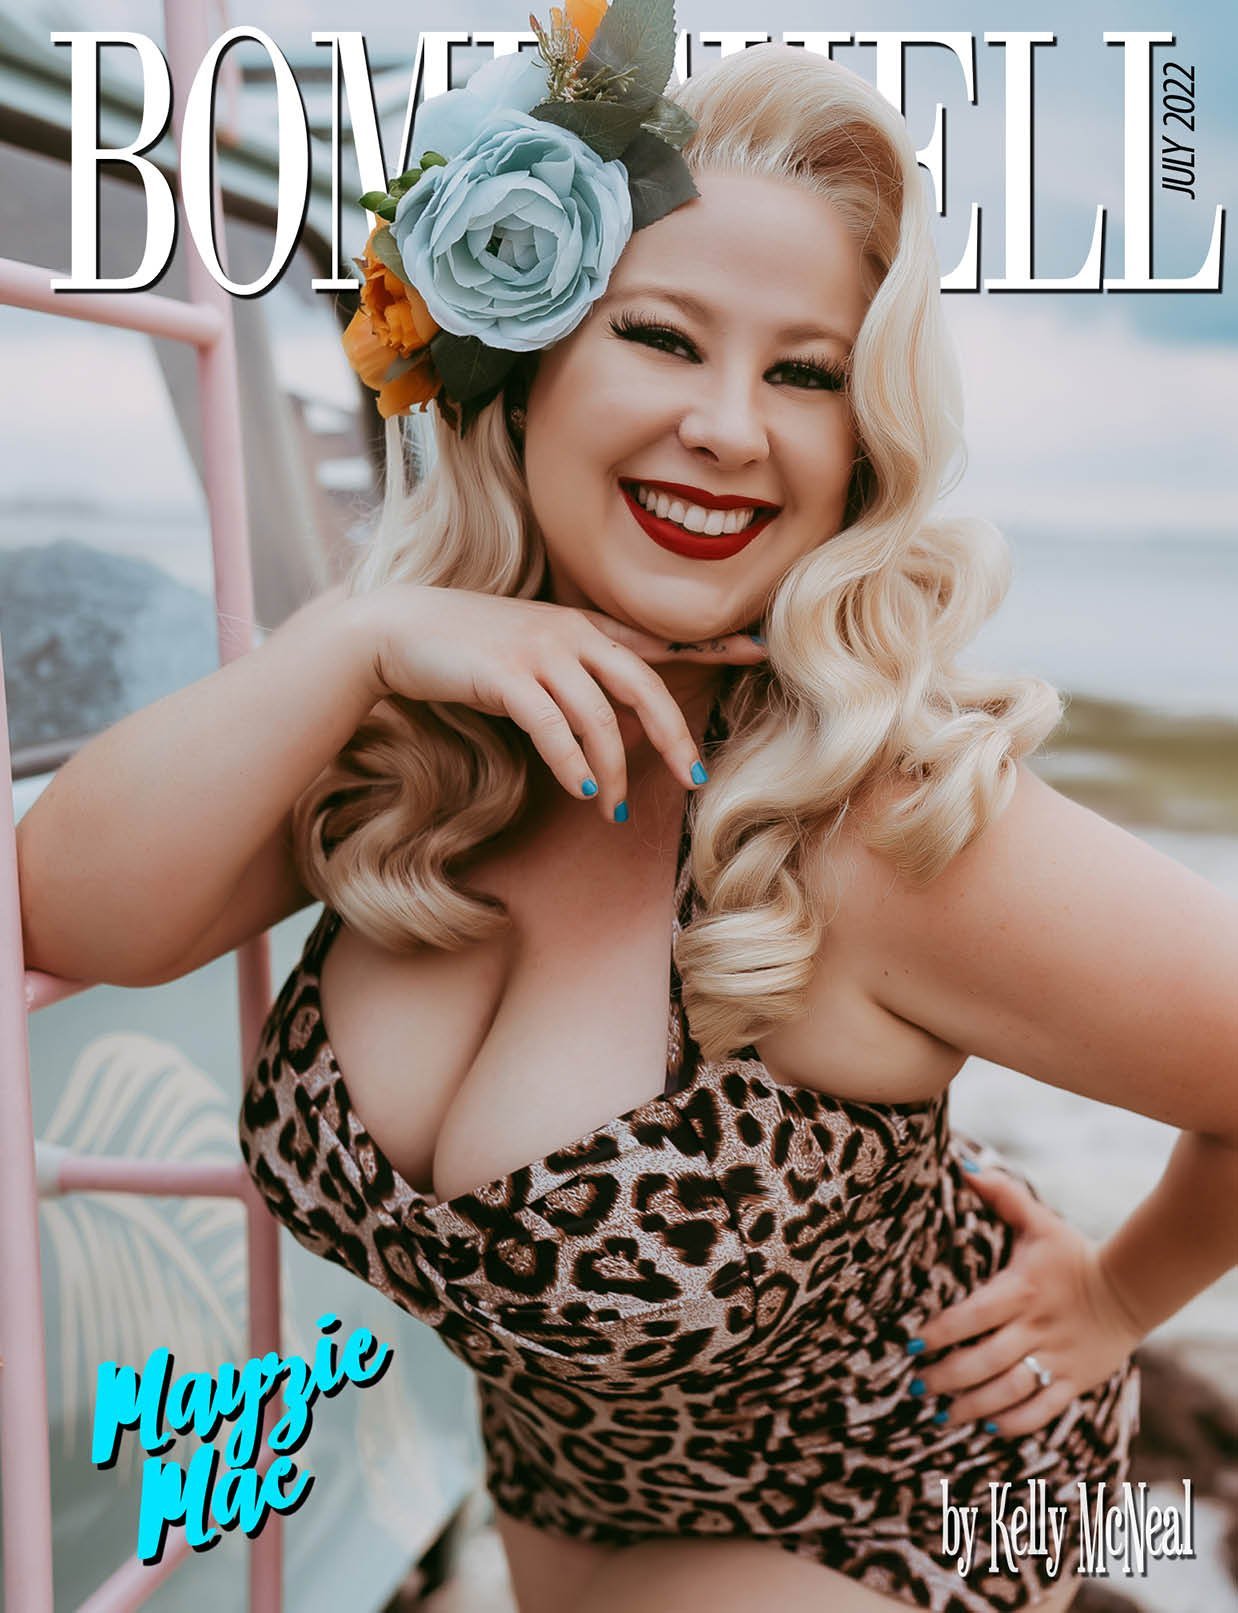
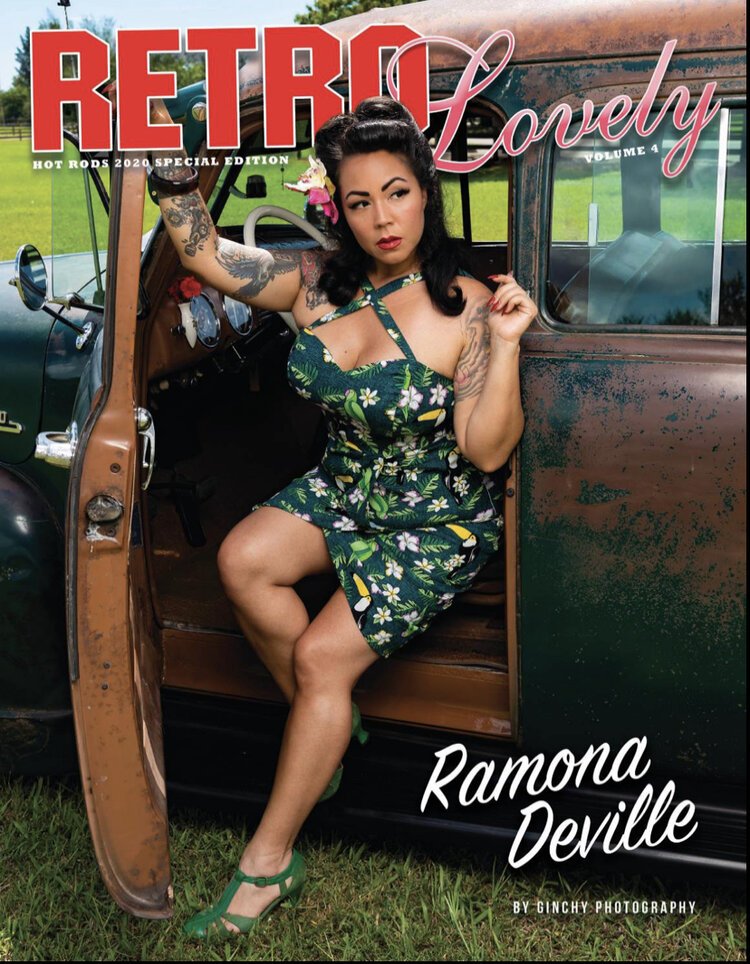
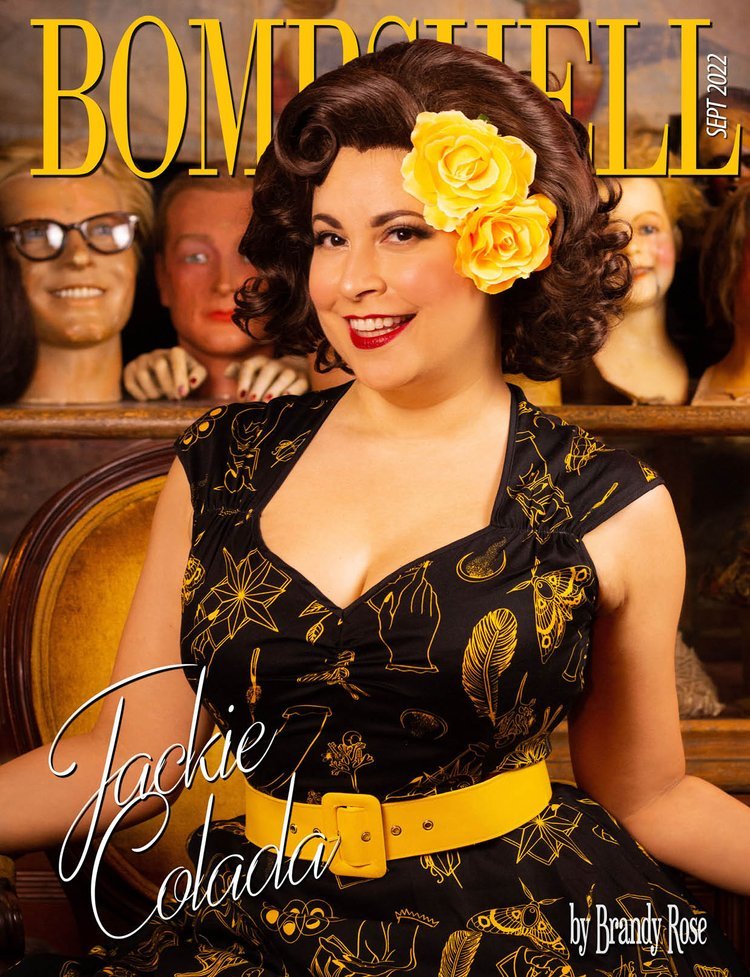
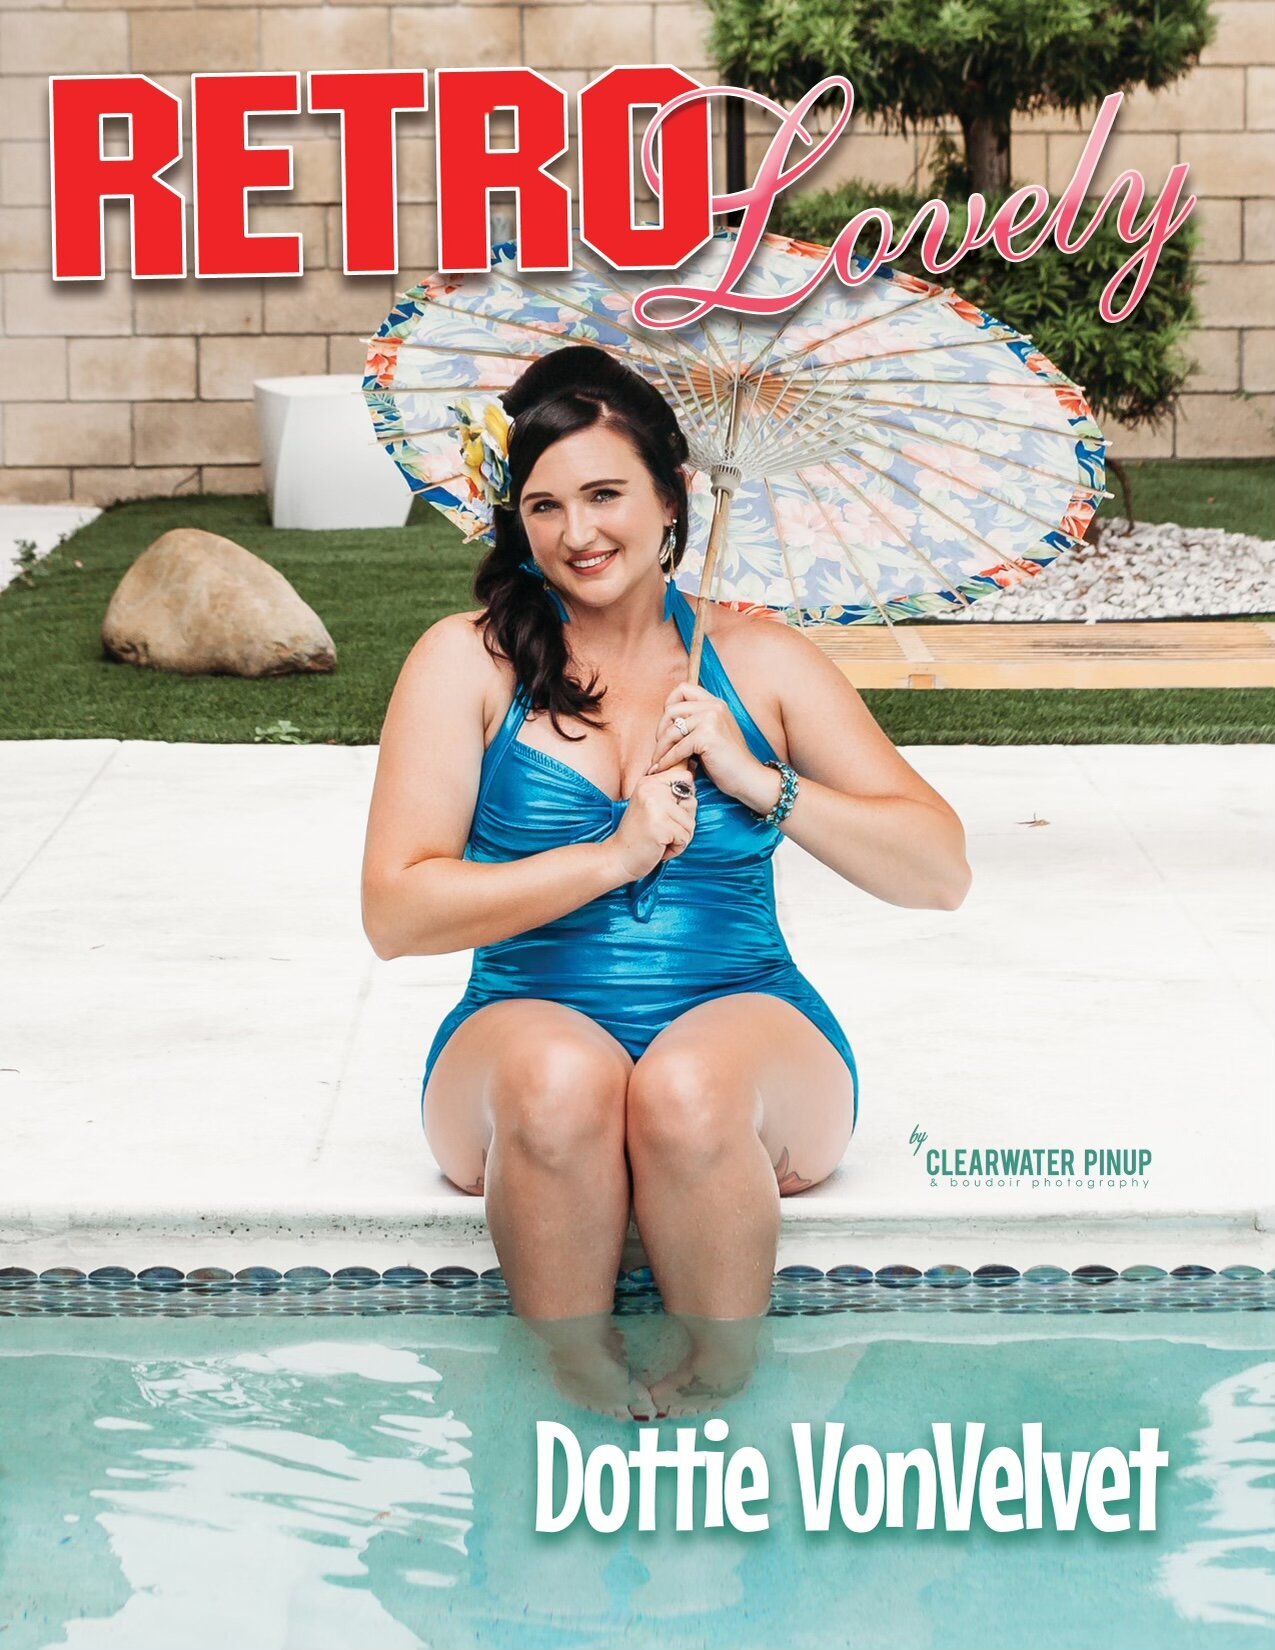
For enthusiasts of the pinup culture, gracing the pages of renowned magazines like Retro Lovely, Bachelor Pad, or Bombshell is a dream come true. These magazines celebrate all things retro, from glamorous fashion to classic beauty. If you've ever aspired to see your image in these pages, this blog post will guide you through the process of getting published, with a particular focus on producing high-quality, professional images, and perfecting your hair and makeup.

The Path to Publication:

Professional Photography:

  • Choose a Reputable Photographer: Collaborate with a professional photographer experienced in pinup photography. They understand the aesthetics and lighting that work best for pinup shots.

  • Pre-Production Planning: Discuss your vision, wardrobe choices, and the magazine's style with your photographer before the shoot.

Hair and Makeup:

  • Book a Skilled Hair & Makeup Artist: A talented makeup artist and hairstylist who specializes in vintage looks can make a world of difference. Ensure your hair and makeup complement the era you're aiming for.

Wardrobe Selection:

  • High-Quality Outfits: Invest in high-quality, authentic pinup attire. Brands like Pinup Girl Clothing, Collectif, and Stop Staring offer classic options.

  • Variety of Looks: Prepare multiple outfits to showcase your versatility and style.

Posing and Expressions:

  • Practice Classic Poses: Work with your photographer on classic pinup poses, such as the iconic pin-up girl V-pose or the flirty over-the-shoulder look.

  • Facial Expressions: Master the art of captivating expressions that suit the pinup era you're emulating.

Location and Props:

  • Select a Fitting Location: Choose a setting that complements the magazine's style. It could be a retro diner, vintage car, or a studio setup.

  • Utilize Props: Incorporate relevant props, like old radios, classic telephones, or vintage accessories to enhance your narrative.

Submitting Your Photos:

  • Follow Submission Guidelines: Review the submission guidelines on the magazines' websites carefully. Each magazine has specific requirements for image format, resolution, and file size.

  • Choose Your Best Shots: Select your strongest and most captivating images to submit. Quality matters more than quantity.

Tips for Walking in Heels on Grass, Gravel, and Other Uncomfortable Paths

Vintage WardrobeVera VelourComment

A great pair of heels can elevate almost any outfit. They can lengthen your body, accentuate your calves, and even make your derriere look a little more shapely. Heels can also complement any outfit, whether you are going for va-va-voom sexiness or adorable cuteness. 

However, heels can also be a nightmare to walk in. Even the most experienced can struggle to walk across a grassy lawn or navigate a gravel path. What’s a girl to do when she plans to attend an all-day event outdoors? 

There are secrets to walking on uneven surfaces and little tricks you can employ to give your feet a break. Follow these tips so you can still rock your favorite pair of heels without getting stuck in the mud. 

Avoid Spikey Heels on Grass

Yes, your stilettos look gorgeous, but they’re also going sink like golf tees the second you start walking on grass. The last thing you want is to get stuck in the ground as your heels sink deeper or to pick up chunks of grass and clods of dirt with each step. Not only can this ruin your look but you will have to wash your heels when you get home. 

Here are your options: 

  • Look for wedge heels. These will spread your weight over the shoe and prevent you from sinking down. 

  • Pick up heel protectors. They actually make clear heel attachments that keep your shoes from touching the grass. This is a great option if you also want to protect your shoes from the dirt and mud. 

  • Bring back-up flats. Grab a purse that’s big enough to hold your shoes. Switch to cute flats when you are walking on grass and then throw on your heels when you reach flatter and safer ground. 

If all else fails, pack some wipes in your purse so you can clean off any dirt that you accumulate on your shoes – especially before you enter a beautiful reception hall or historic home.

Practice Walking on Your Toes   

There are times when a patch of grass is unexpected and unavoidable. When this occurs, use the right walking style. Lift your heel off of the ground and walk on your toes, almost like you are sneaking from one place to another. 

Most people will understand how difficult walking on grass in heels can be and won’t judge your unique walking style. 

Keep in mind that walking on your toes is a serious calf and quad workout. While this option is ideal for small stretches of grass or posing for group photos, don’t rely on your tip-toes for a day of walking. 

Don’t Let Gravel Fool You 

While grass might seem like the mortal enemy of cute shoes, other uncomfortable surfaces can also make your day difficult. Gravel roads can wear you out quickly while peddle and shell paths can also be difficult to walk on. 

This is another time when packing back-up flats can be a lifesaver. You can quickly and comfortably get where you need to be and then throw on your heels once you reach a safe surface. Another option is to keep a friend or partner nearby to help you. A gentleman’s arm can help with stability and prevent you from falling on sharp rocks. 

Prepare Yourself Ahead of a Major Event

If you know that you have an upcoming event where you want to wear heels, take steps to prepare for uncomfortable ground cover. Here are a few ways you can be ready to take on the day. 

  • Break in your shoes. It’s easier to navigate uneven paths in comfortable shoes than brand-new ones. Practice walking in them while doing chores like folding laundry and emptying the dishwasher. You’ll never feel sexier cleaning the cat’s litterbox! 

  • Look at photos of the venue online. This can alert you to any potential walkways that will be difficult to navigate. Even historic cobblestones can cause problems for people in heels. You can also reach out to people who have been to the venue to get a feel for their experiences. 

  • Pack back-up shoes. Keep an extra pair of heels in the car or in your bag just in case. If you break a heel while walking, you won’t have to limp through the rest of the day. 

During the event, look for places to sit down and rest your feet. This is particularly important for long parties, weddings, meet-ups, or car shows. You might not be tired now, but your feet will wear out after hours of walking, standing, and dancing. Forget diamonds, a well-placed chair is a girl’s best friend. 

Thank Your Feet After a Rough Day

When you return home, give yourself a little treat to thank your feet. Elevate them on the couch while wearing your favorite socks or soak them in warm water with your favorite scented body wash. For the next few days, let them rest. Your feet do a lot for you and self-care is a great way to give back. 

You won’t always be able to avoid a muddy match or grass or a sharp shell walkway, but these tips can help you navigate uncomfortable paths with ease. Be sure to share these tips with your friends – they’ve also been in your shoes.

Tips and Tricks for Your Pinup Photoshoot

Photo Shoot TipsMayzie MacComment

The pinup style has an enduring charm that captures the essence of classic beauty, confidence, and a touch of sass. If you're planning a pinup photoshoot, you're in for a delightful journey back in time. In this blog post, we'll share some invaluable tips and tricks to ensure your pinup photoshoot is a resounding success. From wardrobe choices to posing techniques, let's make sure you shine in every frame!

Choosing the Right Wardrobe:

• Vintage-Inspired Attire: Opt for classic pinup clothing, such as high-waisted bottoms, retro swimsuits, swing dresses, or pencil skirts. These iconic styles exude the pinup vibe.

• Bold Colors and Prints: Embrace vibrant colors and bold prints that pop on camera. Reds, polka dots, and nautical themes are classic choices.

• Accessorize Creatively: Don't forget to accessorize! Think headbands, scarves, cat-eye sunglasses, and pearls to add that extra retro flair.

Hair and Makeup:

• Vintage hairstyles like victory rolls, pin curls, or classic waves are quintessential for a pinup look. Consider professional help if you're not confident with your hairstyling skills.

• Dramatic winged eyeliner, red lipstick, and flawless skin are the hallmarks of pinup makeup. Achieving that perfect cat-eye takes practice, so don't be afraid to try different techniques.

Location and Props:

• Consider locations that evoke the era, such as a retro diner, a vintage car, or a classic bedroom setup.

• Utilize props like vintage radios, old suitcases, or a classic telephone to enhance the authenticity of your pinup story.

Posing like a Pinup:

• Posture is Key: Stand up straight with shoulders back, accentuating an hourglass figure. Confidence in your stance is key to nailing the pinup look.

• Embrace Classic Poses: Learn iconic pinup poses like the "victory pose" with one foot slightly forward, or the "sitting pretty" pose with crossed legs and a coy expression.

• Facial Expressions: Work on your expressions. A playful, flirty smile or a sultry pout can add depth to your pinup character.

Working with Your Photographer:

• Communication: Share your vision and ideas with your photographer. Discuss your wardrobe, makeup, and the vibe you want to achieve.

• Posing Guidance: Don't hesitate to ask for posing guidance. A skilled pinup photographer will have expertise in capturing the best angles and expressions.

• Relax and Have Fun: Enjoy the process! The more relaxed and confident you are, the better your photos will turn out.

A pinup photoshoot is a chance to step into the shoes of classic Hollywood starlets and embrace your inner vintage vixen. By carefully selecting your wardrobe, mastering the art of hair and makeup, and perfecting those classic pinup poses, you can create stunning, timeless images. Remember to enjoy the process, and let your personality shine through in every frame. With the right tips and tricks, you're on your way to capturing the enchanting allure of the pinup era.

XOXO, Mayzie Mac

Choosing a Vintage Pinup Name

General InformationMayzie MacComment

Embracing a vintage lifestyle is all about paying homage to the past and infusing a touch of nostalgia into your everyday life. One fun way to do this is by adopting a vintage nickname that embodies the spirit of a bygone era. In this blog post, we'll take you through a step-by-step guide on how to come up with the perfect vintage nickname that suits your personality and style. Let's delve into the world of retro monikers!

Why Choose a Vintage Nickname:

Vintage nicknames not only add a dash of old-school charm but also offer a touch of mystery and intrigue. They can become an essential part of your retro persona, whether you're a pin-up enthusiast, a swing dancer, or just someone who loves the elegance of days gone by. These nicknames can also be fantastic conversation starters and icebreakers in the vintage community.

Identify Key Characteristics:

Consider your personality traits and characteristics that are most prominent. Are you a vivacious and lively spirit, or do you possess the sophistication of a classic film star? Jot down a few keywords that describe you.

Look to Pop Culture:

Dive into the pop culture of your chosen era. This could include classic movies, music, and iconic figures. You might find inspiration in the names of famous actors, musicians, or even characters from vintage films and books.

Play with Wordplay:

Get creative with wordplay and alliteration. Combine your era, characteristics, and pop culture references to craft a unique nickname. Experiment with different combinations until you find one that resonates.

Keep It Authentic:

While crafting your vintage nickname, ensure that it feels authentic to you. It should reflect your true self and be something you're comfortable with. After all, it's not just a name; it's a part of your retro identity.

Your vintage nickname is a unique way to express your love for all things retro. It's a fun and creative process that allows you to become a part of the vintage community with a name that's uniquely yours. Whether you're stepping into the shoes of a glamorous '50s starlet or a dashing gentleman from the Jazz Age, your vintage nickname is a gateway to the past and an exciting addition to your retro journey. So, go ahead, embark on this nostalgic adventure, and let your vintage persona shine!

Embracing the Retro Lifestyle

General InformationMayzie Mac1 Comment

In a world of modernity and fast-paced living, there exists a remarkable group of women who embrace a bygone era with style, grace, and purpose. The Luscious Ladies, a dedicated social group, epitomize the timeless charm of a retro lifestyle.

The Luscious Ladies: A Glimpse into a Retro Lifestyle

The Luscious Ladies are a group of women who have a deep appreciation for the retro lifestyle. This includes everything from the fashion of the 1940s and 1950s to the music, cars, and even the manners of the time. With a shared passion for all things vintage, these ladies have come together to celebrate and preserve the essence of a bygone era.

Community Engagement and Support

One of the most admirable aspects of the Luscious Ladies is their commitment to being a positive force within their communities. This extends beyond their shared love for retro culture; they actively support small businesses within the rockabilly culture. By doing so, they not only promote local entrepreneurship but also help keep the spirit of their chosen lifestyle alive.

Each chapter of the Luscious Ladies across the country takes pride in volunteering their time and efforts to raise money for local charity organizations. This selfless act of giving back to the community highlights their dedication to making a difference where it matters most. Their charity work is a testament to the fact that their love for all things vintage isn't just a personal passion but also a force for good.

Strength in Togetherness

The Luscious Ladies find strength in their sisterhood, offering each other unwavering support and camaraderie. In a world that often moves too fast, they create a sense of belonging that is as timeless as the retro lifestyle they cherish. Their collective enthusiasm for everything vintage is a shared bond that unites them and enables them to share their love of the past with everyone they meet.

In conclusion, the Luscious Ladies are more than just a social group of vintage enthusiasts; they are a testament to the enduring appeal of a retro lifestyle. Their commitment to supporting small businesses, volunteering for local charities, and providing unwavering support to each other is a heartwarming example of how shared passions can create a positive impact in the community. They remind us that, even in the fast-paced world of today, the past can continue to inspire and uplift us all.

Cleaning Vintage Treasures

Scarlette SaintclairComment


You found it!! Thrift store gold that incredible vintage dress you always have wanted and for a steal. Unfortunately it smells a bit and has some weird film on it you noticed once you got in the car and admired it properly! Well don't worry almost any fabric item with care and perseverance can be brought back to its wearable glory. The first step is a gentle wash bath. 

Generously fill either a large sink or a bathtub with lukewarm water.  The item must be able to be completely submerged. and ONLY ONE ITEM AT A TIME! You don't want any accidental color bleeds. Always start your by using the most gentle of products i.e. Woolite, Dreft, Dawn dish soap(works great to spot treat oil and grease stains) or even baking soda. You can work up to harsher products as you feel the item needs more severe treatment. Dissolve one of these products in a pot of hot water then add the completely dissolved solution to the bathtub. 

Lay the garment in the tub and pat it flat with your hands letting the solution run through the garment as it floats in the water.   NEVER AGITATE THE GARMENT.    Let it soak for about 15 to 30 minutes.  Let water out of the tub leaving the soapy garment in the tub.  Whatever the fibre, any wet garment will be much heavier, but wool will be much weaker wet than when dry, so handle it carefully when you lift it. 

The secret is a good rinsing.  Use the shower head attachment if your bath has one and spray rinse the garment moving the fabric folds gently if needed. Do make sure you do this stage thoroughly as you do not want to leave any residue in the garment. If the water running out of the rinse is discolored repeat the wash. I have on occasion had to wash an item multiple times.

 If the garment is wool use a plastic tray to slip under the sweater and support the now very heavy weight of it without causing it to stretch.  If it's cotton or linen move it into your clean bowl and let residual water drain away.  Wrap it carefully in a big bath towel and get rid of that excess water.  Use another bath towel if it helps get rid of more water.  

Once you have gotten most of the water blotted out of the garment use weight strong plastic hanger and let it drip dry over the bath. Be careful not to use a fancy padded hanger or a wooden hanger at this stage, which might transfer wood or dye stains to the item.   If the garment is unusually heavy, use a drying rack.

Okay so you washed it and it still smells a bit, usually the smell is either nicotine or mildew. Don't worry both issues can be tackled with white distilled vinegar. With Cotton or linen fabrics i will just soak in a vinegar and water solution. Other fabrics I spray the vinegar and water mixture 50/50 on with a spray bottle and let hang in the sun. This trick also works on handbags and suitcases. If you get a handbag or suitcase that has a strong odor inside, baking soda usually will do the trick. I coat the inside with baking soda and leave over night, after it has sat, vacuum out the baking soda.

Scarlette Storage Tips

I also keep a laundry dyer sheet in each of my handbags when not in use to keep them fresh smelling:)

Bringing new life to vintage underthings!!

Vintage WardrobeScarlette SaintclairComment

As a pin up model we are always in need of  vintage or retro inspired under garments. There are some great companies making reproduction but it can be very pricey. So we search any where and everywhere for that perfect piece at a steal! For me garage sales and thrift stores are my favorite sometimes you can find something for under $5 other times I search ebay and etsy hoping to find something great and in my size. If you thrift at all your familiar with finding that vintage bullet shaped bra or a pretty slip that has seen better days, its yellowed with age or stained. Most people would just put it back or maybe take it home and try to clean it but you really can't bleach these old items with out the risk of destroying them. 

My trick

Idye poly, it is a fabric dye made specifically for dying nylon and polyester. Now there are a few things with vintage items you should know, the rubber on garters and the plastic hooks can only stand so much heat. So boiling your dye bath as directed on the package is not recommend! Instead I fill my dye bucket with as hot as the sink will get tap water, the less water you use the brighter the color. Make sure to really stir your dye bath prior to immersing items otherwise you get streaks and blotchy spots and if you are looking to have matching set you need to put them in the dye bath at the same time. Keep in mind different fabrics will take the dye differently so they may not match perfectly but they will be close. Sometimes the lace will dye a bit darker since it usually has a bit of cotton blended into the fabric. This can make the pieces more interesting and they photograph beautifully. I will put the items in the dye bath and stir, making sure that they are saturated evenly with dye. I will leave them soak them 30 minutes then remove, rinse really well with cold water, then hang to dry. The results are amazing and its so simple to achieve pretty colored vintage lingerie to shoot in!!

 Scarlette  tip ~ always start with a light color, these items can get dyed again at a later date! I usually will do with a darker shade of the original color. Example an orange dye bath will usually give white pretties a pale shade of peachy orange, a second  bath will make for a brighter shade of orange, next time go with a red bath will give a gorgeous  copper red tone, then burgundy etc. 

Always remember that dyed items can bleed so washing them before wearing is usually a good idea. I will throw a freshly dyed item in the wash with an old towel or two to absorb some of the dye in the wash. I do not recommend wearing dyes lingerie under vintage dresses. If you sweat there could be some dye transfer and its just not worth the risk.

Try this, I know you will not be disappointed!

Pinup Facial Expressions

Photo Shoot TipsVivian Vega1 Comment

Today lets discuss pinup facial expressions. I am of course not the all time expert on pin up faces or anything but I have learned a few things and have seen a few things. It's really important to know your own face. For that I seriously suggest sitting in front of a mirror and trying different expressions. It will feel pretty silly but this is very important for you to see. I also recommend that for poses too! Let's say you want to try to pull off some Marilyn Monroe type expressions but after playing around in front of the mirror you find out it's not really working too well...Don't worry! Every face is different and you just need to find your individual strengths and your preferences. I also suggest before a shoot that you look for posing and facial expression inspiration. You really want to be able to get to your shoot and do your best. When I first started getting a good smile in my photo was so difficult and awkward for me but I eventually realized the more I felt awkward about smiling the better it actually looked. I think that was because I wasn't in a genuine setting where I would really smile like when having a conversation with someone. It was hard to make a genuine smile happen when I was just facing a camera. The A, E, I, O, U rule is also a big help too so keep that in mind while practicing and shooting.

When I say it's important to know your own face and your own preferences I say that because I have learned quite a few things about my own face for example....
- Since my eyes are pretty small in order for my eyes to be more visible in a photo I actually look at the top of the camera or at the top of the photographers head instead of directly at the lens
- My left side of my face is way more structured and photogenic than my right side. I don't like very many photos that come from the ride side of my face but every once in a while I shoot a little from that side anyways just in case but I don't focus on that side
- It's more flattering for my face if I slightly tilt my head back instead of forward

Eventually you will get to a point to where when you do an expression you know how it feels and you know you're doing it the way you want.

Vivian Vega

Posing tips

Photo Shoot TipsKristin Frevele1 Comment

Alright lets talk about posing your hands for a shoot...

If you have a hard time posing your hands, don't worry! It's legit one of the hardest things for most people to think about and control during a shoot. When posing try to keep them what I consider "light" you don't want to apply too much grip to something (like when holding a prop if your holding it too tightly your hands will show the stress). You also don't want to apply too much pressure. Keep this in mind, when you can, as some poses may require holding yourself up (or something) and then it cant really be avoided. I recommend keeping your hands as relaxed as you can with light control over them. For pinup you want your hands to be naturally flowing and delicate. I remember when Nita and I went to a workshop earlier this year. At the end I was waiting around and a model asked me to help her pose. She was attempting a pose in where she was sitting and trying to hold her dress slightly above her knees. She was holding the dress in the correct area but appeared to have a death grip on her dress. Please try to AVOID the death grip! I have also noticed that sometimes people will stick their pinky finger way out. That may feel proper but in the photos it's not flattering to your hand to have one finger extremely separated from the rest of your fingers. It can become an unintentional focal point. Another thing to avoid is when you are placing a hand on your face, arm, body, or leg...again, remember to not apply too much pressure as that will create a dent in your skin. Keep your hands light and softly flowing in and out of poses. And that is the advice I have for today. I will add more if I think of anything else and I hope this helps!

Vivian Vega